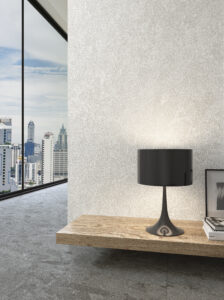
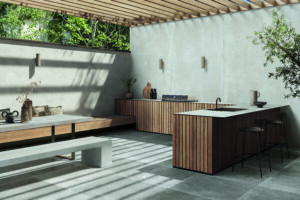
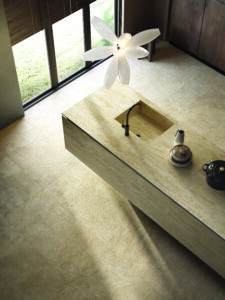
Porcelain slabs are becoming more popular in the design world across the globe, and rightfully so! This beautiful product type is cost and time effective while boasting many exciting features from heat and stain-resistance, to limitless designs and low maintenance.
So, how are porcelain slabs made anyways?
Porcelain is made from fine clay and the clay mineral, kaolinite. The mixture of clay and minerals is heated at high temperatures to form the porcelain. When fired, the mixture becomes a hard, vitrified and non-absorbent clay body that’s molded to various shapes and sizes, thus porcelain products are dense and non-porous. As a result, the product is water, stain, heat and bacteria resistant. Does it get any better than that?!
Where can I use porcelain slabs throughout my space?
From both a commercial and residential standpoint, slabs can be used in a variety of ways. Some of the most popular uses are washrooms for shower walls; countertops for kitchen, vanities and outdoor kitchens, fireplaces and high impact feature walls. Commercially, they are also used frequently in grand condo and office tower lobbies, in restaurants, boutiques and also exterior building façade cladding. For inspiration, check out how some ways to use porcelain slabs in your space:
View available porcelain slab collections on our website.
What are the benefits of porcelain slabs for countertops?
12mm and 20mm porcelain slabs for countertops are known for both versatility and durability. When compared to granite, porcelain is 30% stronger while typically being thinner than natural stone. It’s also more resistant to chipping, cracking, scratching and general wear and tear. Available in a range of looks and one of the easiest materials to clean makes porcelain countertops a worthy investment for your counter spaces.
While marble and other stones can offer natural beauty, you can expect a higher price point as well as moderate to high time and costs associated with maintenance, such as more frequent sealing, a porous surface that’s more prone to etching and more difficult to clean/disinfect. Quartz can provide a less temperamental option than marble with an array of styles to choose from but can still require attention when it comes to its limited heat and stain resistance. Porcelain slab countertops offer a cost effective solution with the highest resistance to heat, stains and scratching. They also offer the best graphic representation of marble, stone, concrete and wood looks compared to any other man-made surface.
Stay tuned for a new product launch in Spring 2022!
What sizes and thicknesses are available?
The standard size of porcelain slabs are roughly 5×10.5 feet, with 5 feet typically being the widest size manufactured. We also carry product in 4×8/4×9 feet which can be more accessible to use in tighter spaces or lower ceilings. Product can be custom ordered in smaller or larger formats, and also cut down by your installer or fabricator based on your needs.
Different thicknesses are typically used in different applications although there is some crossover. Keep in mind that 6mm come rectified and ready to install, where 12mm and 20mm slabs come unrectified and need to be worked by fabricator.
Floor: 6mm, 12mm
Walls: 6mm, 12mm, 20mm
Countertops: 12mm, 20mm
What’s the installation process like for 6mm porcelain slabs?
Porcelain slabs can be installed on walls prepped with a suitable substrate such as the Schluter Kerdi Board as well as floors that have been pre-levelled. Because they are relatively thin and light, 6mm porcelain slabs can be installed directly over an existing hard surface, like existing marble or tile or vinyl, saving time and costs especially with renovations.
For the installation, there is more prep work involved, sometimes different tools required and should be approached differently to installing regular tile. Just like other porcelain, 6mm porcelain slabs are installed using a thin-set mortar applied to the wall or floor, back buttered to get full coverage on the slab and adhered to the substrate.
Of course, this is a very simplified explanation and it varies from project to project! For more information on installation, be sure to consult a trusted installer.


